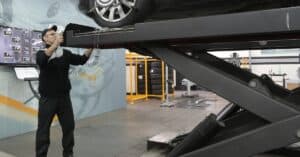
In a manufacturing plant, Inspection, and quality control are the most important process in order to make a high-quality product. Inspection and quality control ensures the standard quality by checking the product during manufacturing at different stages.
If the product is not able to meet the desired quality, the product will reject and there will no further process on that unit. It saves unnecessary processing costs on rejected parts.
Quality control and inspection are fundamental processes that ensure manufactured products meet specific standards and requirements. Let me break down what these concepts mean and how they work in practice.
What you are going to learn?
What are Inspection and quality control in manufacturing?
Inspection is important to maintain a certain quality during the manufacturing of a product. Quality control is a process by which customer ensures receive product free from defects.
Inspection is a specific activity within quality control. It’s a hands-on examination of products, materials, or processes to verify they conform to specifications. Inspectors look for defects, measure dimensions, test functionality, and check appearance.
Quality control is the systematic process of checking products and production processes to ensure they meet predetermined quality standards. Think of it as the overall strategy a company uses to maintain consistency and reliability in what they produce. It involves setting standards, measuring performance against those standards, and taking corrective action when things don’t meet expectations.
Let me explain both the term separately-
Definition of Inspection:

Objectives of Inspection:
- Inspection separates defective components from the non-defective component so that adequate quality can be maintained.
- Inspection locates defects in process or raw material which otherwise causes problems at the final stage.
- It prevents further working on spoiled semifinished products. It helps the product to be more economical.
- Inspection detects the weak position and trouble in the weak position by checking the design.
Types of Inspection methods:
- Revolving process, patrolling or floor inspection,
- Fixed inspection,
- Key-point inspection,
- Final inspection.
1. Revolving Inspection:
2. Fixed Inspection:
3. Key-point inspection:
4. Final Inspection:
What is Quality control?
Basic fundamentals of Statistical Quality Control
Statistical Quality Control uses 3 scientific techniques, namely,
- Sampling Inspection,
- Analysis of the data,
- Control charting.
Thus, Inspection and quality control are the most important department in any Production unit.
What is the role of inspection in quality control?
It’s very important for every organisation that the quality of the products is maintained when they are delivered to the consumers since the product quality is the topmost parameter for the success of any organization. However, during the production, employees make mistakes sometimes, machines and equipment have breakdowns. This leads to destabilisation of the process, and results of that low-quality product can be produced.
Hence, inspection and quality checking become mandatory to ensure customer satisfaction. Inspection and testing are the processes of controlling product quality by comparing it with the standards and specifications. During the inspection process, they focus on appearance, construction, and working of the product. Inspection is one of the operational parts of quality control.
The Human Element
Despite advances in automation, human judgment remains valuable in quality control. Experienced inspectors can spot subtle problems that machines might miss. They can also make decisions about borderline cases where a defect might be acceptable or might require rejection.
Training is essential. Quality control personnel need to understand specifications, know how to use inspection equipment, and recognise what constitutes acceptable versus unacceptable quality.
Benefits for Manufacturers and Consumers
Effective quality control and inspection protect both the company and its customers. Manufacturers reduce costs by catching defects early rather than dealing with returns, warranties, or recalls. They build trust with customers, which leads to repeat business and positive word-of-mouth.
For consumers, quality control means products that work reliably, last longer, and are safe to use. When you buy something that performs exactly as expected, quality control has done its job.
Continuous Improvement
The best quality control systems don’t just catch defects; they help prevent future ones. By analysing inspection data, companies identify patterns and root causes of problems. This information drives improvements in design, processes, and supplier selection.
Quality control is not about achieving perfection, which is often impractical or too expensive. Instead, it’s about maintaining acceptable quality levels consistently while continuously working to improve. This balance between quality and cost is what keeps manufacturing competitive and sustainable.
In today’s global marketplace, quality control and inspection aren’t optional extras; they’re essential business practices that separate successful manufacturers from those who struggle with customer complaints, returns, and damaged reputations.
FAQs
What are the 4 types of quality inspection?
The 4 Types of Quality Inspection are:
1. Pre-Production Inspection
This happens before manufacturing begins. Inspectors check raw materials, components, and machinery to ensure everything is ready and meets specifications. This prevents problems from starting in the first place.
2. During Production Inspection (In-Process Inspection)
Conducted while products are being manufactured, typically when 10-30% of the order is complete. This catches defects early in the production run, allowing for immediate corrections before too many defective items are made.
3. Pre-Shipment Inspection (Final Inspection)
Performed when production is complete, and products are ready for shipping, usually when at least 80% of the order is finished and packed. This is the final check to ensure products meet all quality standards before they leave the factory.
4. Container Loading Inspection
Takes place during or after the loading of products into shipping containers. Inspectors verify that the correct products and quantities are being shipped, check packaging integrity, and ensure proper loading to prevent damage during transit.
Each inspection type serves a specific purpose in the quality control timeline, working together to minimise defects, reduce costs, and ensure customer satisfaction. The key is catching problems as early as possible in the manufacturing and shipping process.
Is inspection QA or QC?
Inspection is part of QC (Quality Control), not QA (Quality Assurance).
Here’s the quick difference:
QA (Quality Assurance) is proactive and process-focused. It’s about preventing defects by designing good processes, training people properly, and creating systems that build quality in from the start.
QC (Quality Control) is reactive and product-focused. It’s about detecting defects through inspection, testing, and measurement of actual products.
Inspection is a QC activity because it involves examining finished or in-process products to find defects that have already occurred.
Think of it this way: QA asks, “Are we doing things right?” while QC asks, “Did we make it right?” Inspection answers that second question by physically checking the product.
The 7 QC Tools
The 7 Basic Quality Control Tools are simple statistical and graphical methods used to identify, analyse, and solve quality problems in manufacturing:
- Check Sheet (Tally Sheet)
- A simple form for collecting and organizing data
- Uses tick marks or checkmarks to record how often something occurs
- Makes data collection easy and systematic
- Histogram
- A bar chart showing the frequency distribution of data
- Displays how often different values occur
- Helps visualise patterns and variation in measurements
- Pareto Chart
- A bar graph that ranks issues from most to least frequent
- Based on the 80/20 rule (80% of problems come from 20% of causes)
- Helps prioritise which problems to solve first
- Cause and Effect Diagram (Fishbone/Ishikawa Diagram)
- Shows all possible causes of a problem
- Organised into categories like materials, methods, machines, and people
- Helps teams brainstorm root causes
- Scatter Diagram
- Plots two variables to see if they’re related
- Shows correlation between factors (like temperature and defects)
- Helps identify cause-and-effect relationships
- Control Chart
- Tracks process data over time with upper and lower control limits
- Shows whether a process is stable or out of control
- Detects trends and unusual variations
- Stratification (Flowchart)
- Separates data into groups or layers for analysis
- Sometimes replaced by flowcharts that map process steps
- Helps understand where problems occur
Quality expert Kaoru Ishikawa popularised these tools, and they remain widely used because they’re simple, practical, and effective.
What are the 8d and 7 QC tools?
8D Problem Solving
8D (Eight Disciplines) is a structured method for solving problems and preventing recurrence. The 8 steps are:
- Form a Team – Gather people with relevant knowledge
- Define the Problem – Describe what’s wrong specifically
- Implement Containment – Stop the problem from reaching customers
- Find Root Cause – Identify why the problem happened
- Choose Solutions – Select permanent corrective actions
- Implement Solutions – Put fixes in place
- Prevent Recurrence – Update procedures and systems
- Congratulate the Team – Recognize the team’s work
It’s widely used in automotive and manufacturing when serious defects occur.
7 QC Tools
The Seven QC Tools are basic visual techniques for analyzing quality data:
- Check Sheet – Simple form for collecting data with tick marks
- Histogram – Bar chart showing frequency distribution of data
- Pareto Chart – Bar chart identifying the vital few problems (80/20 rule)
- Cause-and-Effect Diagram (Fishbone/Ishikawa) – Shows potential causes branching into categories
- Scatter Diagram – Plots two variables to see if they’re related
- Control Chart – Line graph tracking process stability over time
- Stratification (Flow Chart) – Separating data into categories for analysis
These tools help teams visualize problems, identify patterns, and make data-driven decisions without complex statistics.


8 thoughts on “Inspection and Quality control, 4 types of inspection, Statistical Quality Control.”